Turbulator Sprinkler System Installation: A Comprehensive Guide
Planning and Preparation
Before you start installing your Turbulator sprinkler system, it's essential to plan and prepare carefully. This includes determining the size and shape of the area to be watered, evaluating the soil type, and selecting the right Turbulator sprinkler heads and components. You'll also need to consider the water pressure and flow rate in your area, as well as any local building codes and regulations.
Here are some key considerations to keep in mind:
- Determine the size and shape of the area to be watered
- Evaluate the soil type and adjust your sprinkler system accordingly
- Select the right Turbulator sprinkler heads and components
- Consider the water pressure and flow rate in your area
- Check local building codes and regulations
Step 1: Mark Out the Sprinkler Head Locations
Using a spray paint or marker, mark out the locations where you'll be installing the Turbulator sprinkler heads. Make sure to space them evenly and according to the manufacturer's recommendations. This will ensure that your sprinkler system provides even coverage and minimizes waste.
Step 2: Dig Trenches for the Pipes

Furthermore, visual representations like the one above help us fully grasp the concept of Turbulator Sprinkler System Installation.
Using a trenching shovel or a rented trenching machine, dig trenches for the pipes that will connect the Turbulator sprinkler heads to the main water source. Make sure the trenches are at least 12 inches deep and 6 inches wide to accommodate the pipes and any other components.
Using the manufacturer's instructions, lay out the pipes and fittings according to the sprinkler system's design. Make sure to connect the pipes securely using fittings and tape, and test the system for leaks before moving on to the next step.
Step 4: Install the Turbulator Sprinkler Heads
Using the marked locations as a guide, install the Turbulator sprinkler heads, making sure they're level and secure. Connect the sprinkler heads to the pipes using the manufacturer's recommended fittings and tools.
Step 5: Connect the Sprinkler System to the Main Water Source
Using the manufacturer's instructions, connect the sprinkler system to the main water source, making sure to follow all safety precautions and local building codes.
Step 6: Test and Adjust the Sprinkler System
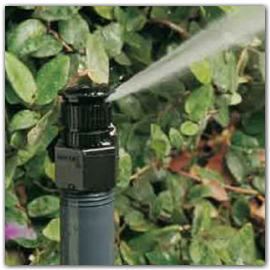
This particular example perfectly highlights why Turbulator Sprinkler System Installation is so captivating.
Using a hose or other test tool, test the sprinkler system to ensure it's working correctly and providing even coverage. Adjust the sprinkler heads and pipes as needed to achieve optimal results.
Conclusion
Installing a Turbulator sprinkler system can be a complex process, but with the right guidance and preparation, you can achieve professional-grade results. Remember to plan carefully, follow local building codes and regulations, and test the system thoroughly to ensure optimal performance. By following these steps, you'll be able to enjoy a lush, healthy lawn with minimal watering and maintenance.
Additional Resources
For more information on Turbulator sprinkler system installation, including detailed tutorials and manufacturer's instructions, visit the following resources:
- Rain Bird: A Global Irrigation Company
- Turbulator Sprinkler System Installation Guide
- Irrigation System Installation Tips and Tricks


 - wikiHow")

! - YouTube")


