How to Protect a Word Document: A Comprehensive Guide
Are you concerned about the security of your Microsoft Word documents? Do you want to protect sensitive information from unauthorized access? If yes, then you're in the right place. In this article, we'll show you how to protect a Word document with a password, and other security features to safeguard your sensitive files.
Password Protecting a Word Document
Protecting a Word document with a password is a simple process that can be done using the built-in features of Microsoft Word. To do this, follow these steps:

Such details provide a deeper understanding and appreciation for How To Protect A Word Document.
- Open the Word document that you want to protect.
- Click on the "Review" tab in the top menu bar.
- Click on the "Protect Document" button in the "Protect" group.
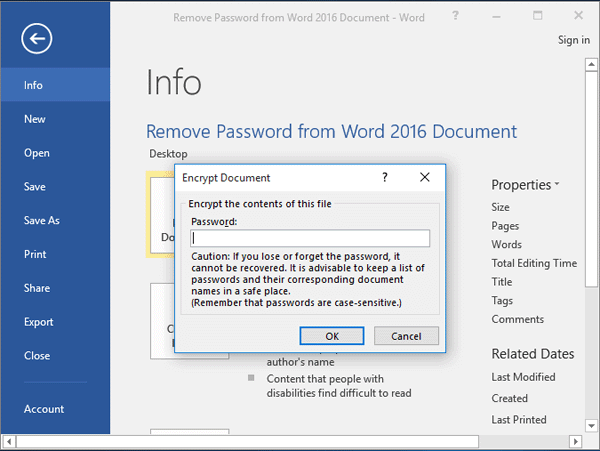
- Choose "Encrypt with Password" from the drop-down menu.
- Enter a password in the "Password" field and confirm it by re-entering it in the "Verify Password" field.
- Click "OK" to apply the password protection.
When you save the document, it will be encrypted with the password you entered. To open the document, you'll need to enter the password. If you forget the password, you won't be able to open the document, and you'll need to use a password recovery tool to recover it.
Other Security Features to Protect a Word Document
Moving forward, it's essential to keep these visual contexts in mind when discussing How To Protect A Word Document.
While password protection is a good start, there are other security features that you can use to protect a Word document. Here are some of them:
- Always Open Read-Only: This feature prevents others from editing your document, even if they have the password. To enable this feature, go to the "Review" tab, click on the "Protect Document" button, and choose "Always Open Read-Only" from the drop-down menu.
- Mark as Final: This feature prevents others from making any changes to your document, even if they have the password. To enable this feature, go to the "Review" tab, click on the "Protect Document" button, and choose "Mark as Final" from the drop-down menu.
- Protection Zone: This feature allows you to specify a range of cells that you want to protect from editing. To enable this feature, go to the "Review" tab, click on the "Protect Document" button, and choose "Protection Zone" from the drop-down menu.
Sensitive information, such as personal data, financial information, or confidential business information, needs to be protected from unauthorized access. Here are some tips to help you protect sensitive information:
- Use a strong password: Use a strong password that is difficult to guess, and make sure to keep it confidential.
- Use encryption: Use encryption to protect your sensitive information from unauthorized access.
- Use a secure storage location: Store your sensitive information in a secure location, such as a password-protected folder or a cloud storage service that offers encryption and access controls.
Conclusion
Protecting a Word document with a password and other security features is an essential step to safeguard your sensitive files from unauthorized access. By following the tips outlined in this article, you can ensure that your Word documents are secure and protected from potential threats. Remember to always use a strong password, encryption, and secure storage locations to protect your sensitive information.


")
")


