Tie Tying for Beginners with Diagrams
Tying a tie can seem like a daunting task, especially for beginners. However, with the right guidance and practice, anyone can learn to tie a tie. In this article, we will provide a step-by-step guide on tying a tie with diagrams, along with some helpful tips and insights on different tie knots. The first step in tie tying is to choose the right knot. With so many different types of knots to choose from, it can be overwhelming. Here are a few popular knots for beginners:- Four-in-Hand Knot: A simple and versatile knot that is perfect for everyday formal wear
- Windsor Knot: A classic knot that is easy to learn and creates a symmetrical, triangular shape
- Pratt Knot (Shelby Knot): A simple and stylish knot that is perfect for beginners and pros alike
- A tie
- A mirror
- A instruction guide with diagrams
Step 1: Begin with the basics
Start by placing the tie around your neck with the wide end on your left side and the narrow end on your right side. The tie should be hanging down about 12 inches below your neck.
Step 2: Cross the wide end over the narrow end
Cross the wide end over the narrow end, so that it forms an "X" shape.

Step 3: Loop the wide end around the narrow end
Loop the wide end around the narrow end, so that it forms a loop.

Step 4: Pass the wide end through the loop
Pass the wide end through the loop from underneath.
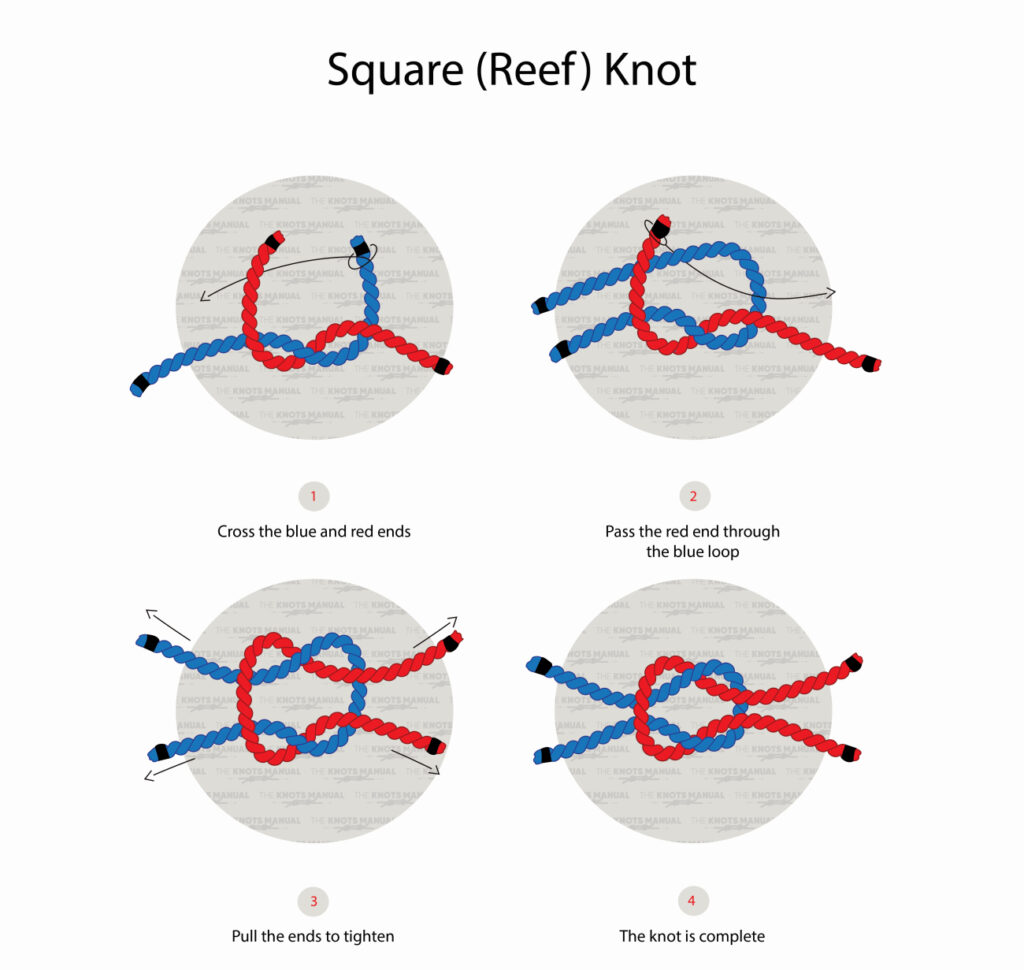
Furthermore, visual representations like the one above help us fully grasp the concept of Tie Tying For Beginners With Diagrams.

Step 5: Tighten the knot
Pull the wide end gently to tighten the knot.

Step 6: Adjust the tie
Adjust the tie so that it is centered and the knot is snug against your shirt.


Common Mistakes to Avoid
- Not leaving enough room at the neck
- Not crossing the wide end over the narrow end correctly
- Not tightening the knot enough


")


 - wikiHow")

