Setting Up a Network Printer on Your School Network: A Step-by-Step Guide
Overview
Setting up a network printer on your school network can be a bit tricky, but with the right steps, you can get your printer up and running in no time. A network printer is connected to a secure network, which can limit your access to certain areas of the system. However, most printers on the network are set up in such a way that you can connect to them using your own device.What is a Network Printer?
A network printer is a printer that can be used by multiple computers on a home or office network. It's a great way to share a printer among team members or students in a school setting. To connect to a network printer, you'll need to follow the steps below, which are tailored to your school's network.Steps to Set Up a Network Printer on Your School Network
###Step 1: Verify the Network Type
Before setting up your printer, you need to verify that the network is set to Private. To do this, follow these steps:Step 2: Connect to the Network Printer
Furthermore, visual representations like the one above help us fully grasp the concept of Setting Up Printer On School Network.
Windows Devices
To connect your Windows device to the network printer, follow these steps:- Click the Apple Icon in the upper left corner of your screen.
- Click System Settings...
- Look up "Printers & Scanners" in the search box.
- Click Printers & Scanners.
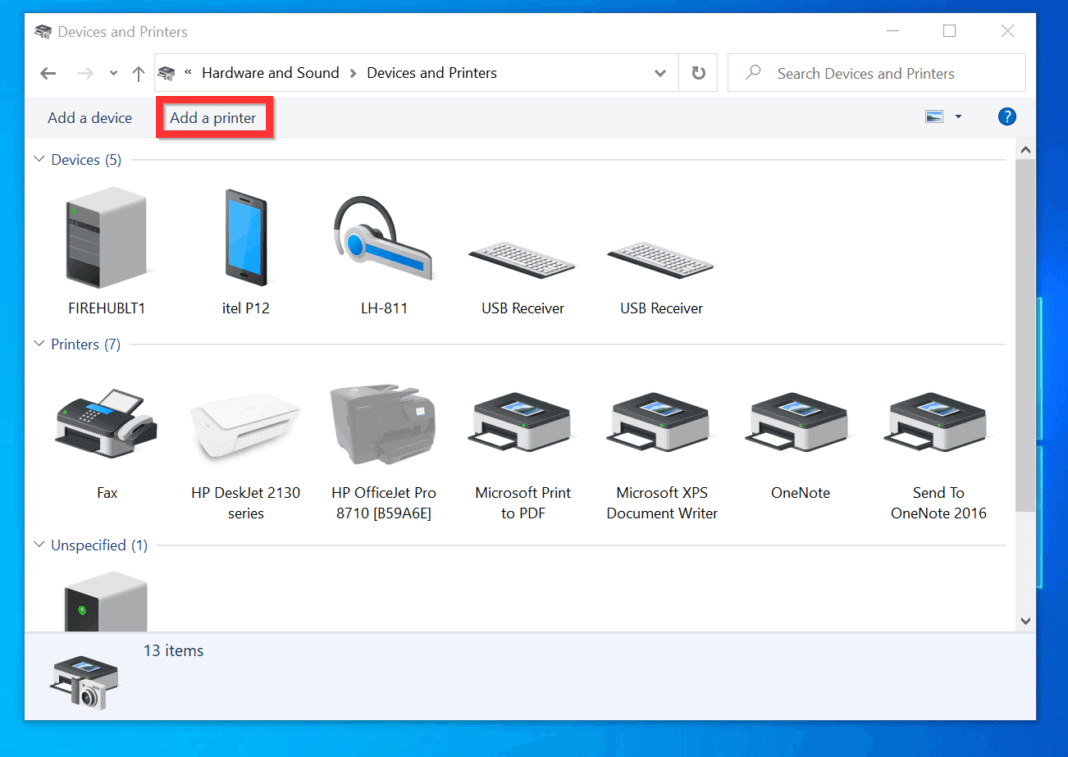
- Select Add Printer, Scanner, or Fax...
- Select the IP option.
- Type the name of the printer and add .prn.mst.edu to the end.
- Change the protocol to HP Jetdirect - Socket.
- Wait until the progress window disappears, then look in your Printers and Faxes window, where you should see a connection to the printer.
- Repeat the process to connect to any other printers you need access to.
- Set your default printer as desired.
MacOS Devices
To connect your MacOS device to the network printer, follow these steps:- Click the Apple Icon in the upper left corner of your screen.
- Click System Preferences...
- Click Printers & Scanners.
- Click the "+" button.
- Select the printer from the list, and enter the printer's hostname and URL (usually: \\server\printer_name).
- Enter your school's username and password.
- Click "Add" to complete the setup.
Common Issues and Troubleshooting
Can't Find the Printer
If you're unable to find the printer in your device's list, check the following:- Ensure the printer is turned on.
- Check the network settings on your device to ensure it's connected to the school network.
- Restart your device and try searching for the printer again.
Can't Connect to the Printer
If you're unable to connect to the printer, check the following:- Verify that the printer is connected to the school network.
- Check the printer's status on your device to ensure it's online.
- Restart your device and printer, then try connecting again.
Conclusion


