Master the Art of Tying a Tie with Ease: A Step-by-Step Guide
Are you tired of struggling to tie a tie? Do you want to look sharp and professional for work or special occasions? Look no further! In this comprehensive guide, we will walk you through the step-by-step process of tying a tie using pictures. With our easy-to-follow instructions, you'll be tying a tie like a pro in no time.The Basics: Choosing the Right Tie
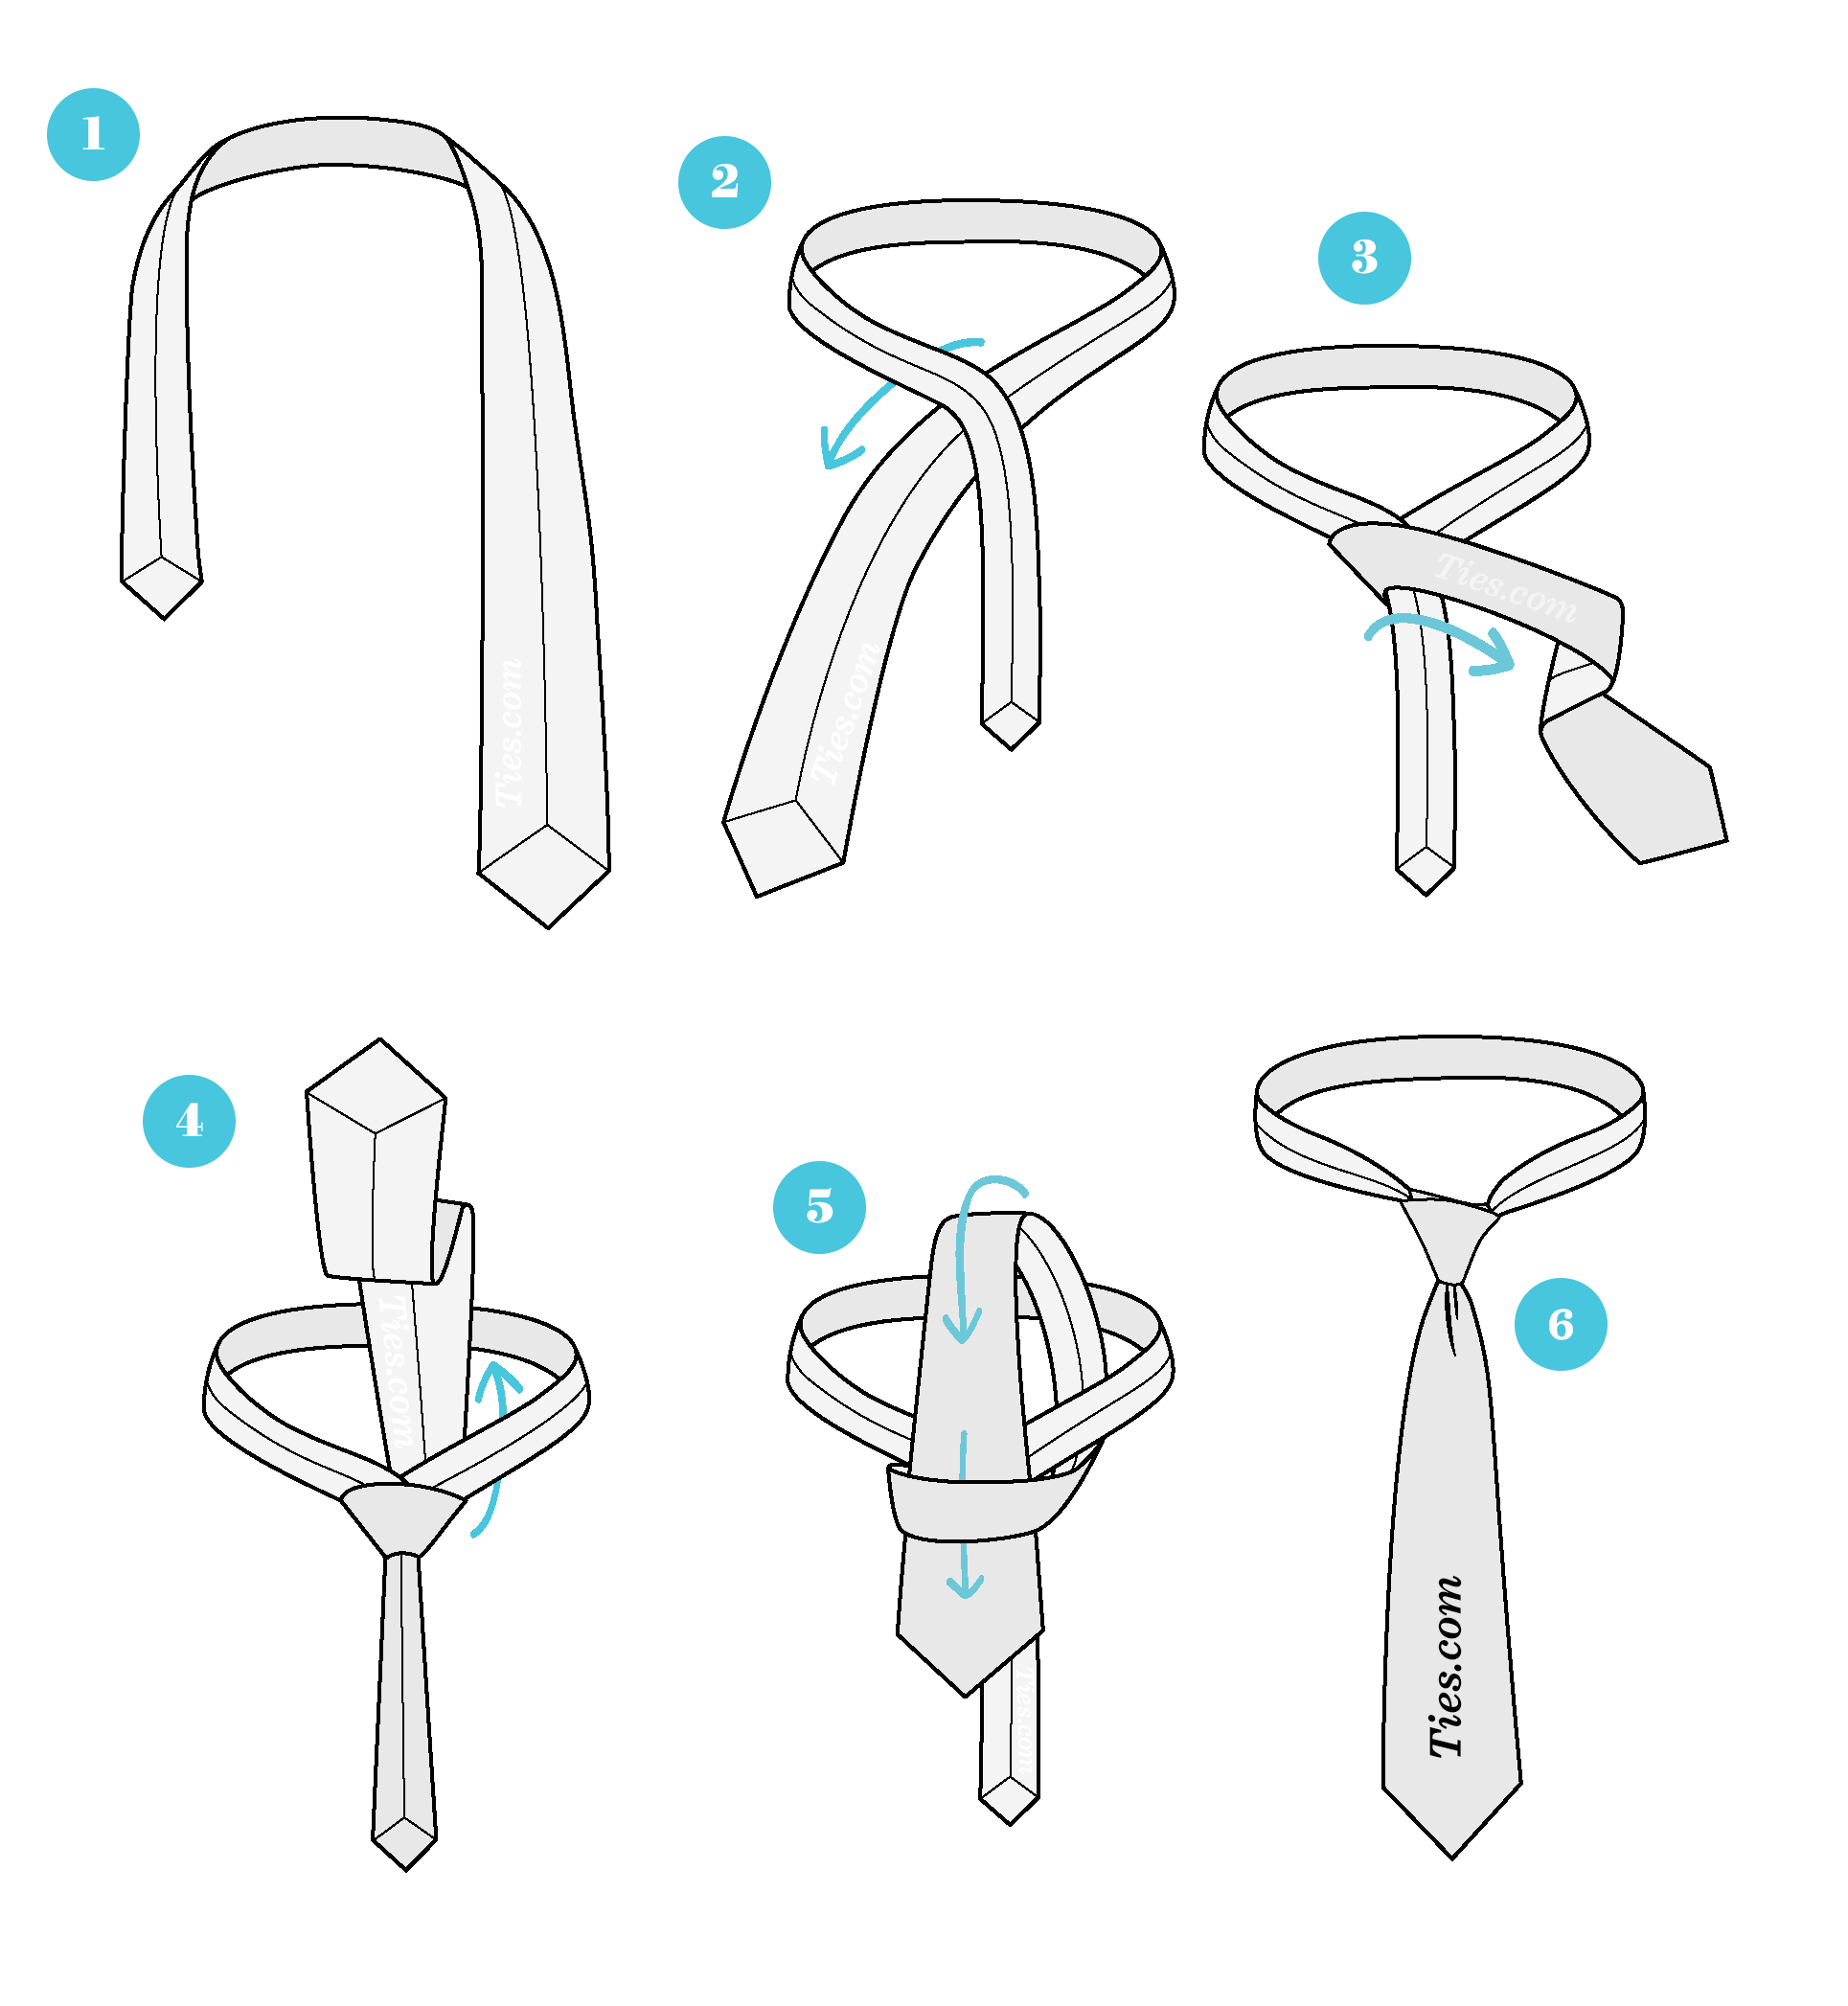
Before we dive into the step-by-step instructions, it's essential to choose the right tie for the occasion. The type of tie you choose will depend on the dress code and the occasion. Here are some general guidelines: * For business or formal events, choose a conservative and classic tie style. * For casual events or everyday wear, choose a tie with a bit more personality and flair. * Make sure the tie is made of a high-quality material and is not too long or too short. Here's a step-by-step guide to tying a tie:Step 1: Begin by facing a mirror and standing up straight. Place the tie around your neck with the wide end on your left side and the narrow end on your right side. The tie should be hanging down about 12 inches below your neck.
Step 2: Cross the Wide End Over the Narrow End
Step 2: Cross the wide end of the tie over the narrow end, so that it forms an "X" shape. This will help you get a good starting point for tying the knot.
Step 3: Loop the Wide End Around the Narrow End

Step 3: Loop the wide end of the tie around the narrow end, and then pass it behind the narrow end. This will help you create the foundation of the knot.
Step 4: Bring the Wide End Up and Through the Loop
Step 4: Bring the wide end of the tie up and through the loop that you just created in step 3. This will help you start to form the knot.
Step 5: Pass the Wide End Behind the Narrow End Again
Step 5: Pass the wide end of the tie behind the narrow end again, just like you did in step 3. This will help you tighten the knot.
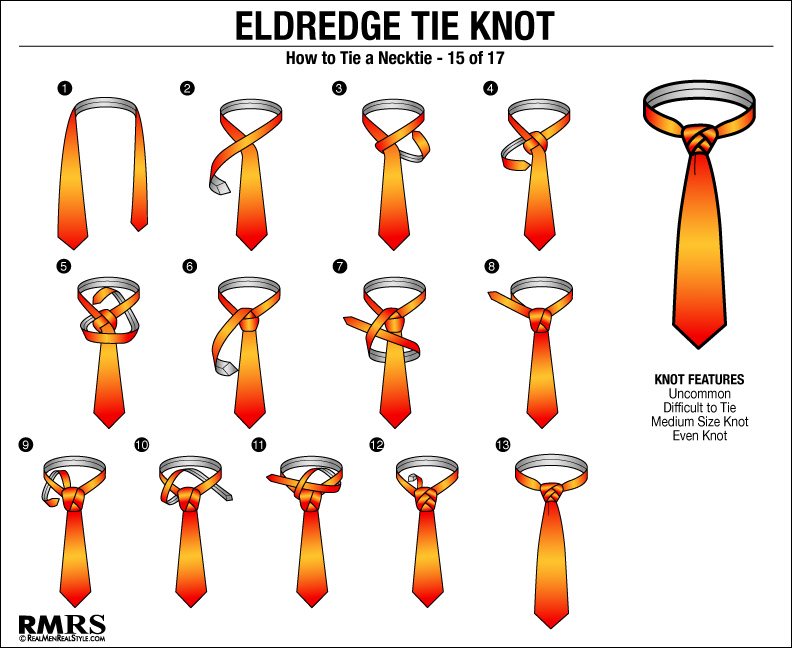
As we can see from the illustration, Step By Step Pictures For Tying A Tie has many fascinating aspects to explore.
Step 6: Bring the Wide End Up and Through the Loop Again
Step 6: Bring the wide end of the tie up and through the loop again, just like you did in step 4. This will help you tighten the knot even further.
Step 7: Adjust the Tie and You're Done!
Step 7: Adjust the tie so that it's centered and the knot is snug against your shirt. Tuck the narrow end of the tie into your shirt and you're done!
Additional Tips and Tricks