Trimming Black Dog Nails in Winter: A Practical Guide
- When it comes to trimming a dog's nails, the process can be intimidating, especially if the dog has black nails.
- As a dog owner, it's essential to learn how to trim your dog's black nails safely and effectively to prevent any potential harm.
- This guide will walk you through the process of trimming black dog nails in winter, including the tools and techniques you need to know.
Trimming your dog's nails is a routine task that many dog owners handle with confidence, but when your dog has a coat of jet-black fur, this simple task can become considerably more challenging.
Unlike dogs with lighter-colored nails, where the quick (the sensitive part of the nail containing blood vessels and nerves) is easily visible, black nails can make it difficult to see where to cut.
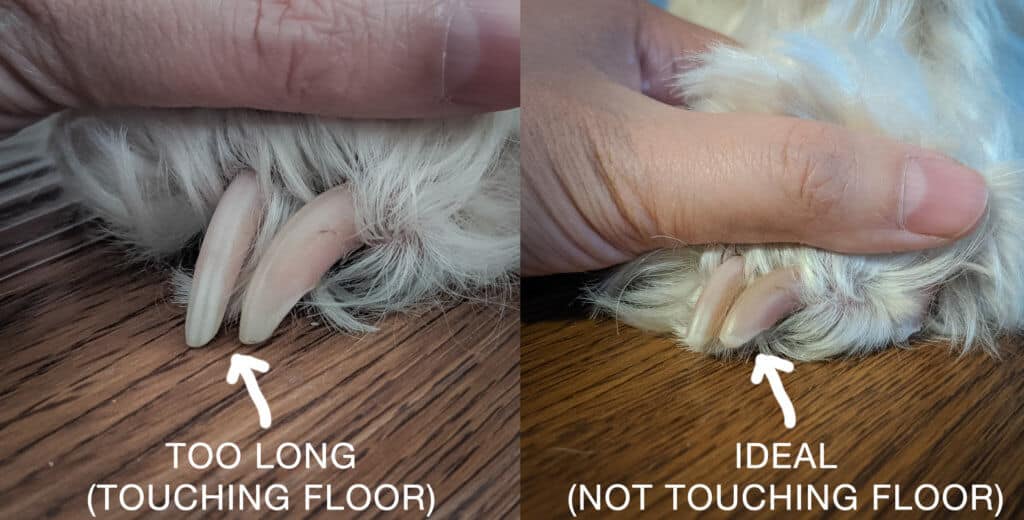
Long nails can lead to arthritic joints in the toes and wrists and can also cause discomfort when walking or running, making it difficult for dogs to maintain proper posture and balance.
Choosing the Right Tools
When it comes to trimming black dog nails, choosing the right tools is essential.
Firstly, you'll need a pair of dog nail clippers specifically designed for black nails, which often have a different cutting edge to prevent crushing the nail.
Additionally, you'll need to use a nail file or emery board to smooth out the edges and prevent sharp edges from cutting the quick.
Identifying the Quick
One of the biggest challenges when trimming black dog nails is identifying the quick.
The quick is the sensitive part of the nail containing blood vessels and nerves, and cutting it can be painful for your dog.
Trimming Black Dog Nails: Step-by-Step Guide

Here are the steps to follow when trimming your dog's black nails:
- Before you start trimming, make sure you have all the necessary tools, including a pair of dog nail clippers, a nail file, and an emery board.
- Place your dog on a comfortable surface or in a sitting position, depending on their preference.
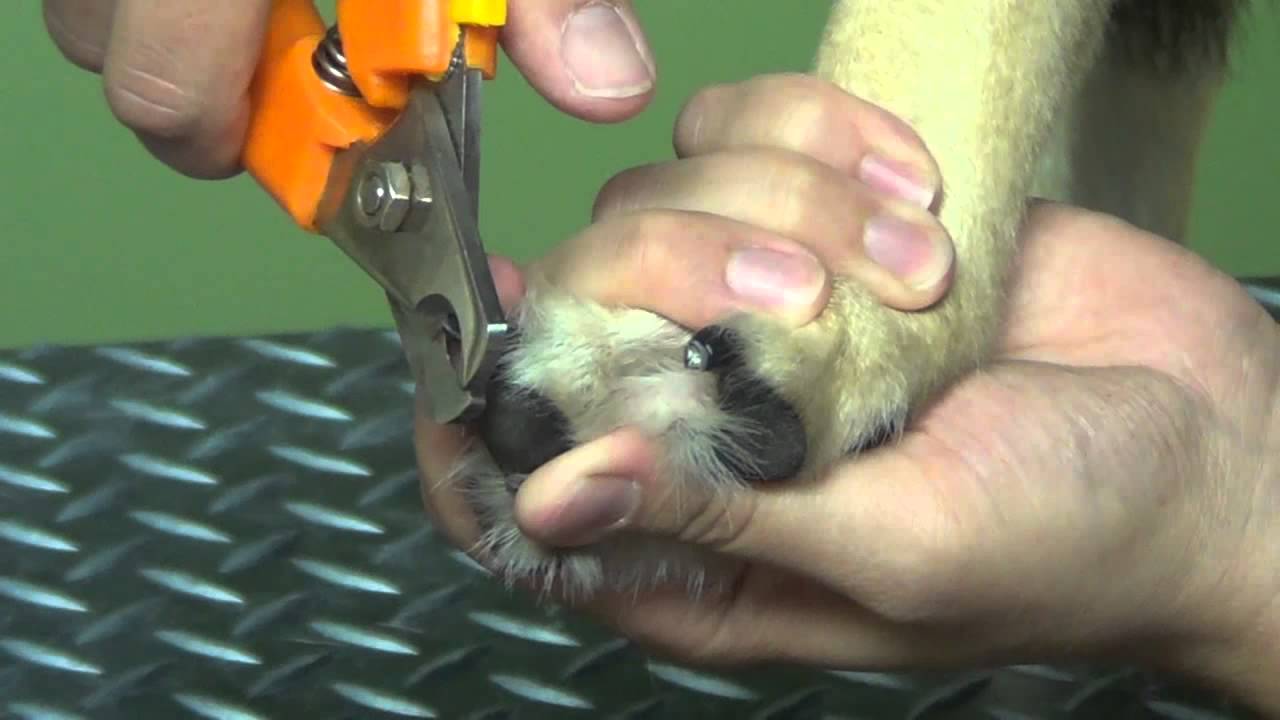
- Hold your dog's paw firmly but gently, ensuring you're holding it in a comfortable position.
- Identify the dark color of the nail and locate the gray circle just before the quick.
- Place the clippers just before the gray circle and carefully trim the nail, following the natural curve.
- Use a nail file or emery board to smooth out the edges and prevent sharp edges from cutting the quick.
- Repeat the process for the other nails, taking care to avoid cutting the quick.
Preventing Cutting the Quick
One of the most common mistakes when trimming black dog nails is cutting the quick.
However, with the right techniques and tools, you can prevent cutting the quick and avoid causing your dog any discomfort.
Here are some tips to help you prevent cutting the quick:
- Use a gradual "shave-and-see" approach, cutting thin layers until the gray circle appears.
- Identify the gray circle before cutting, which indicates the start of the quick.
- Use a nail file or emery board to smooth out the edges and prevent sharp edges from cutting the quick.
- Take your time and work carefully, as rushing can lead to mistakes.
- Consider consulting a veterinarian or a professional dog groomer if you're unsure about trimming your dog's nails.
Conclusion
Trimming black dog nails in winter can be challenging, but with the right tools and techniques, you can safely and effectively trim your dog's nails.
Remember to identify the quick by looking for the gray circle, use a gradual "shave-and-see" approach, and smooth out the edges with a nail file or emery board to prevent cutting the quick.
By following these steps and tips, you can ensure that your dog's nails are trimmed safely and effectively, preventing any potential harm or discomfort.


")


")


